


7-Minute Zettelkasten Kickstart
Stop Dreaming About Zettelkasten, Start Doing It in Obsidian in 7 Mins (No Complex Theories!)
📝 Stop Dreaming, Start Doing: Your 7-Minute Zettelkasten Kickstart in Obsidian (No PhD Required... But It Helped Me Get Mine!)

Heard the Zettelkasten hype? Are you intrigued by the promise of a "second brain" in Obsidian – a knowledge system that connects your ideas and sparks new insights? But then the questions hit: What even are "entry points" or "hub notes"? Why do I need a "Zettel ID," and what does that even mean? Should I be using folders, or is that "wrong" for Zettelkasten? Suddenly, you're bogged down by complex theories, endless "how-to" debates, and a paralyzing fear of "doing it wrong."
You're not alone. That feeling? It's implementation paralysis, and it's the biggest hurdle for aspiring Zettelkasten users, especially within the powerful, yet sometimes blank, canvas of Obsidian. Many brilliant practical knowledge workers – students, researchers, writers, developers, lifelong learners like you – see the theoretical benefits but get stuck on the actual clicks, the overwhelming jargon, and the "right" way to set things up. You want to move from confusion to clarity and action.
But what if you could cut through that noise and get started – really started – in the next 5 minutes with a ridiculously practical approach? One that doesn't require you to understand every philosophical nuance before you create your first note?
My name is Pamela Wang, and this is Actionable Notes. I've spent five years wrestling with and refining a bottom-up, Zettelkasten-style thinking system. It’s not just theory; it’s the system that helped me survive my PhD and write my thesis. I’ve seen the overwhelm, the confusion around fleeting notes, permanent notes, MOCs, those very questions about IDs, folders, and how to even begin navigating a new system.
That's why I've distilled the absolute necessities into 7 practical steps. This isn't a deep dive into philosophy (we can save that for later, recommendations below). This post is your TLDR guide to action.It’s about getting your hands dirty in Obsidian and building momentum today.
Ready to finally kickstart your Zettelkasten? Let's go.
The 7 Essential Steps to Your First Zettel in Obsidian
Step 1: ✍️ Capture Your Idea
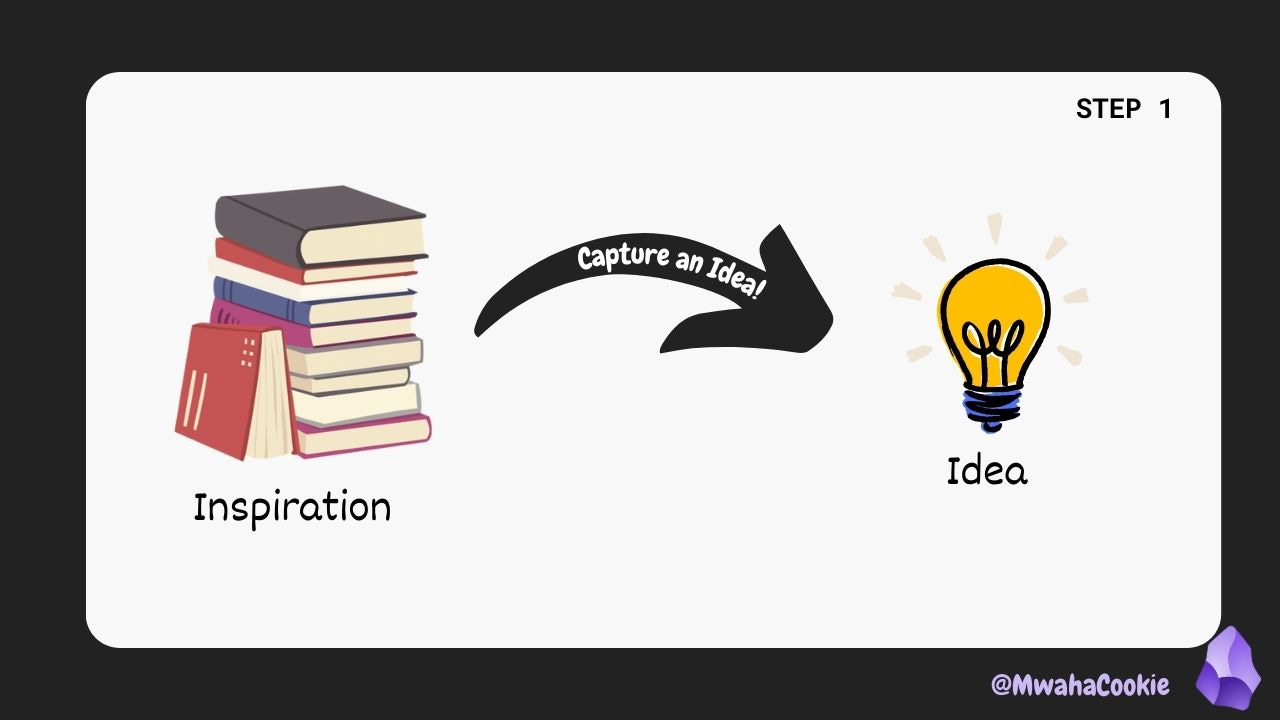
This is your fleeting thought, a quote that resonated, a question that popped into your head while reading, or a sudden connection you made. Don't judge it, just get it down quickly.
When you capture a fleeting thought, you are not trying to explain what the author is saying as much as trying to create an anchor that you can come back to and elaborate on later. It doesn’t have to be what the article is about.
Example: You are reading an article about stoic philosophy, and then you think about how the concept of “three types of control” is related to “modern autonomy in eastern cultures”. The insight you want to capture, is these two put together. So take the original quote and add a scribble down there about what you think about it.
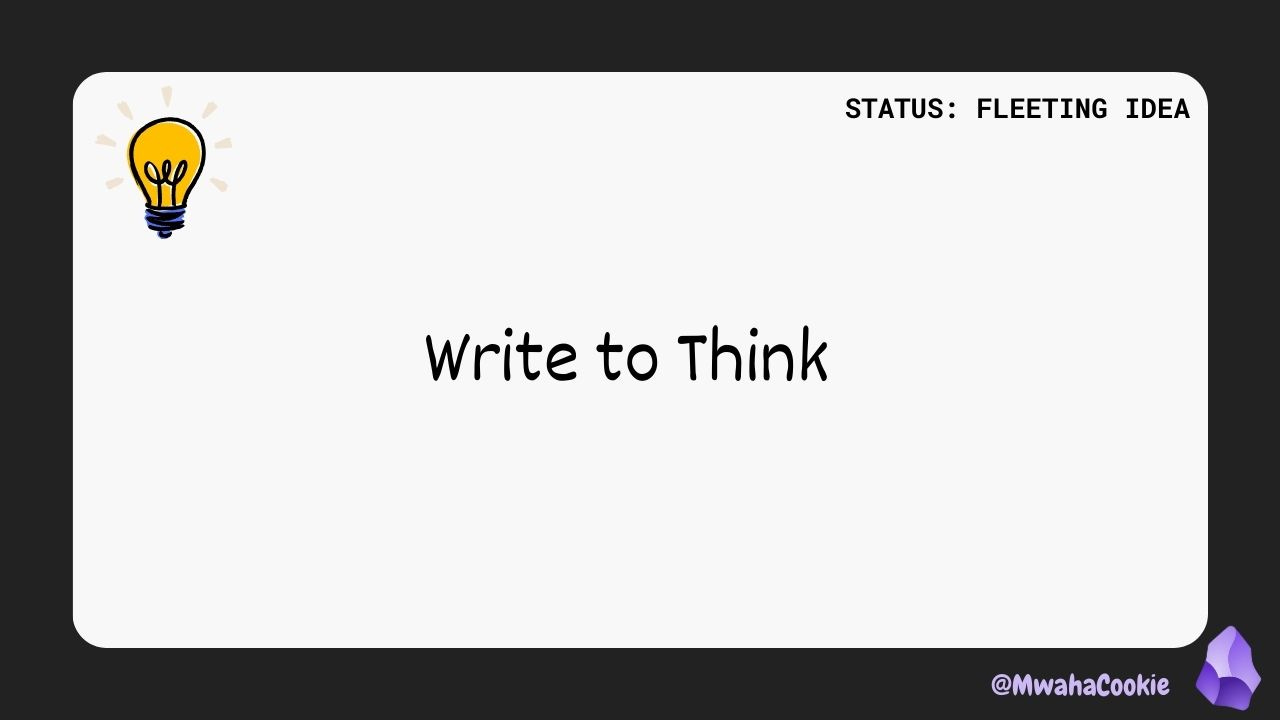
Visual Example: Fleeting Note (Seed)
While watching one of David Perell’s videos, this idea popped up, and I scribbled “Write to Think” in a note. This note is now a fleeting note.
Practical Use-Case
Your goal here is speed and low friction. Save that idea before it disappears.
🎯 Quick Capture At Desk: In Obsidian, you can record this idea down as a new note (simply create a new note in your Inbox or use QuickAdd capture) or leave it in your daily note as a bullet point and add #Fleeting to it.
🎯 Quick Capture on the Go: I really recommend voice dictation here.
A shortcut to your favourite voice dictation app on your phone.

Apple Watch-users, try the Drafts complication.

Step 2: 🧠 Develop Your Idea with Unique Insight
This is where you transform that fleeting thought into a "Zettel" (a single, atomic note).
What are you doing here: Write more words.
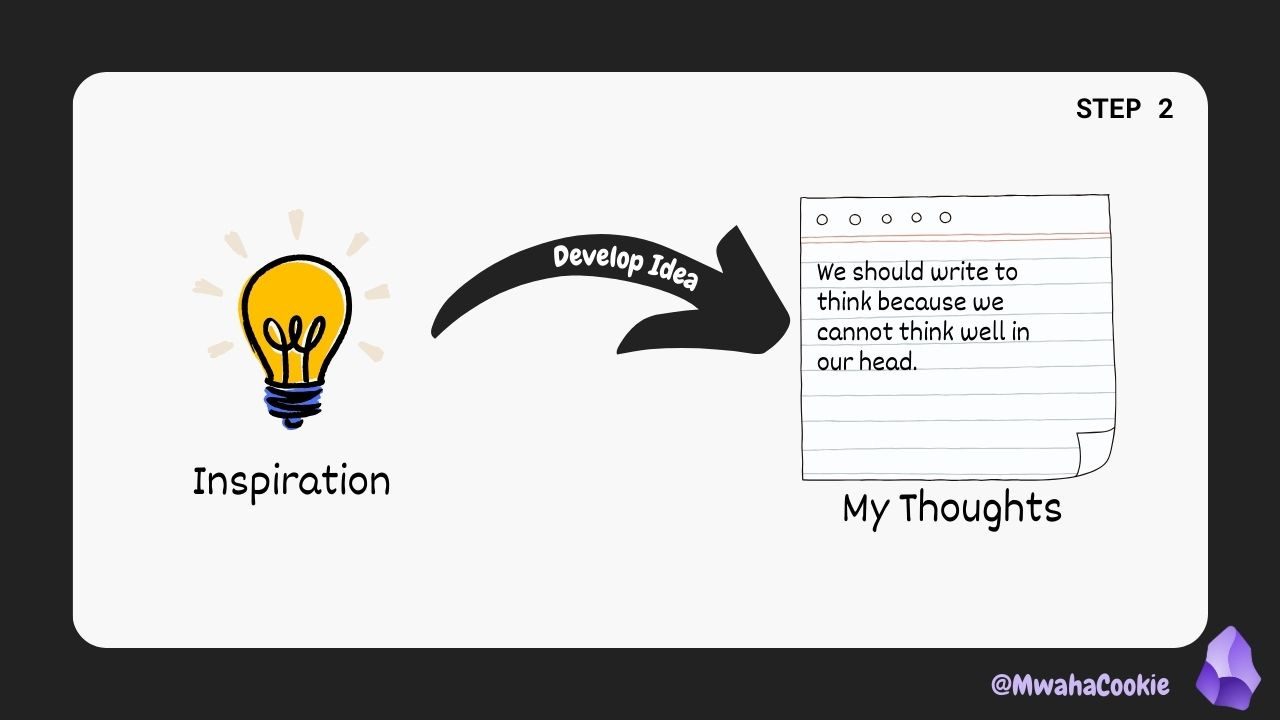
Rephrase the idea in your own words. What does it mean to you? Why is it significant? Add your perspective, your questions, your connections. This is your insight, not a summary of the author’s words.
Visual Example: Seedling Note
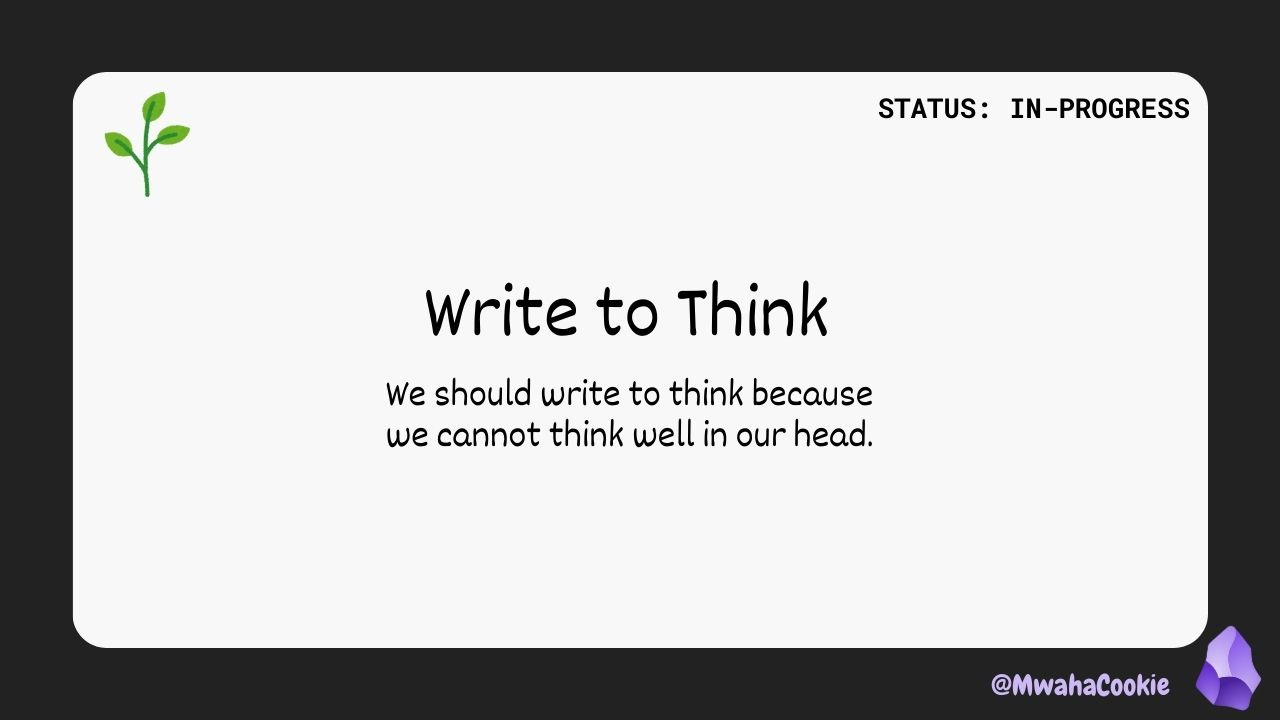
In the Zettelkasten space, people use the analogy of “seed” for the fleeting note, and “seedling” for the note-in-progress. This is the seedling stage.
Practical Use-Case
Usually we revisit our notes when we have time to work on them. I recommend doing this first thing in the morning.
The process:
🤔 Decide whether to process this note: If yes, go keep going. If no, discard or put in a “Sleeping” Folder (Change the tag from #Fleeting to #SleepNote)
Why: Not all fleeting thoughts are worth becoming a part of your second brain.
📝 Expand and Explain Take that raw capture and expand on it in a new, dedicated note. Write as if you're explaining it to your future self or readers with no context about this topic.
Why: People often forget. What makes sense to you now, will not make sense to your future self.
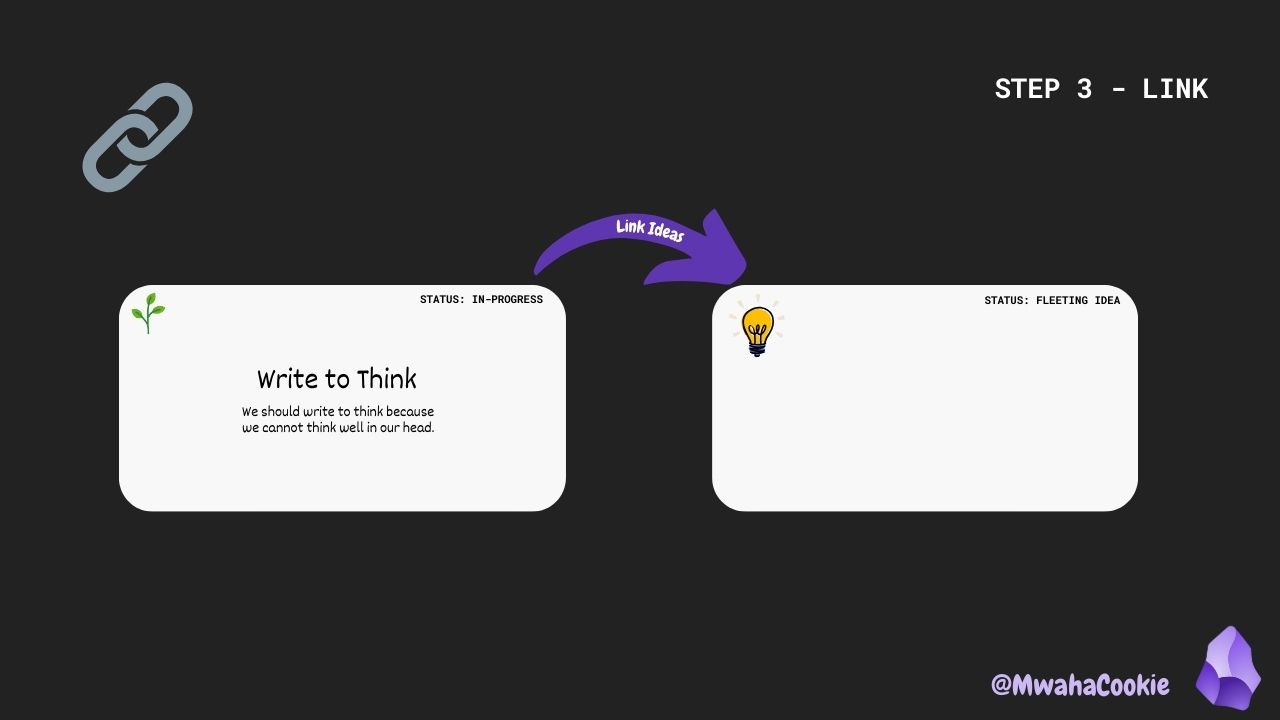
Step 3: 🔗 Link to Other Ideas and Explain the Connection
Now, think: how does this new idea relate to your existing notes?
Don't just link; explain why you're linking. What's the relationship? This context is absolutely necessary, and I recommend you do both ‘annotation’ and properly written context.
Visual Example (New Idea):
The most common scenario is that while developing your idea, this idea sparks more ideas. So now you need to make more fleeting notes that are linked to your current note.
What you do:
Make another fleeting note, from a link in your current note.
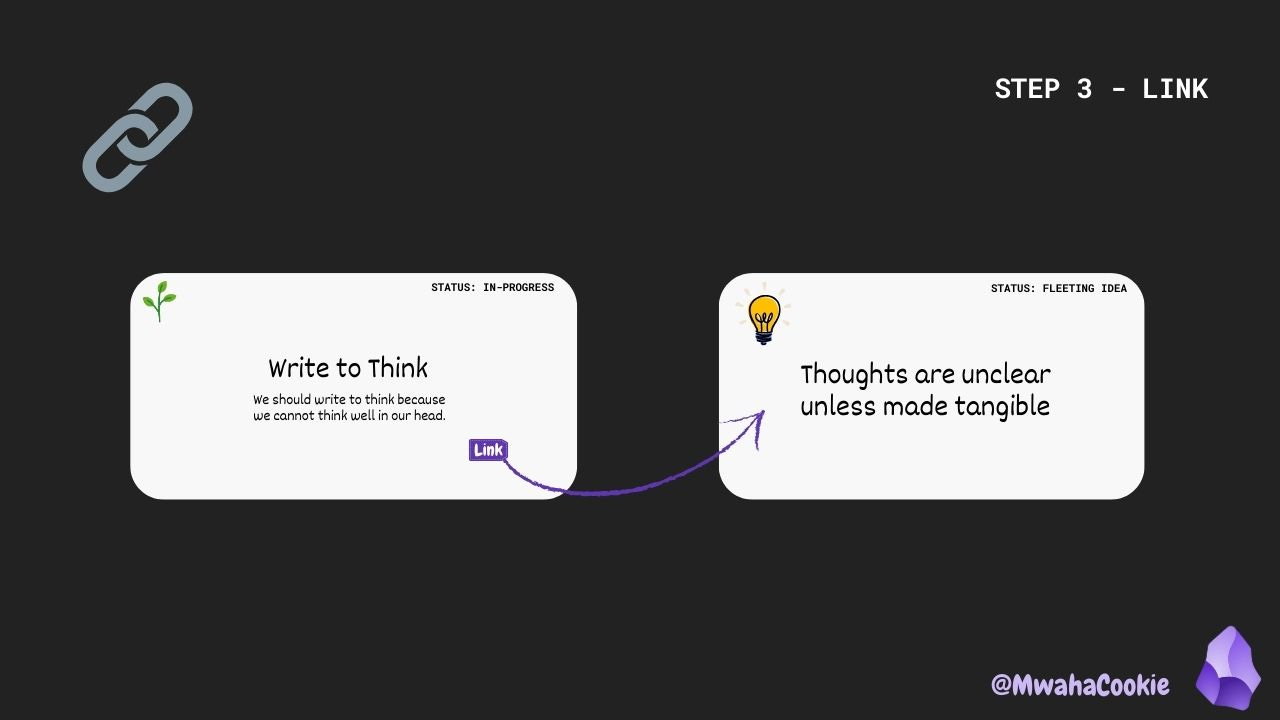
So your original note gets links to both existing ideas and new ideas:
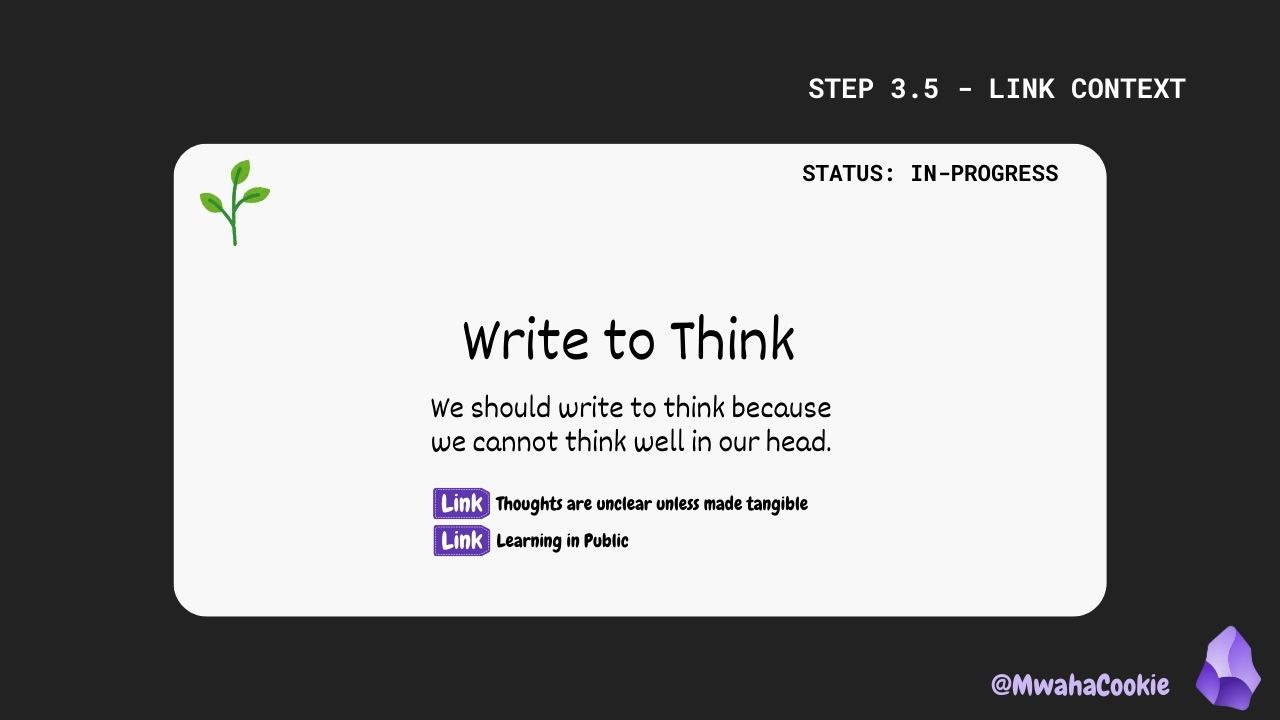
But this still doesn’t have the context. So the next step is to explain how the linked note relates to this note.
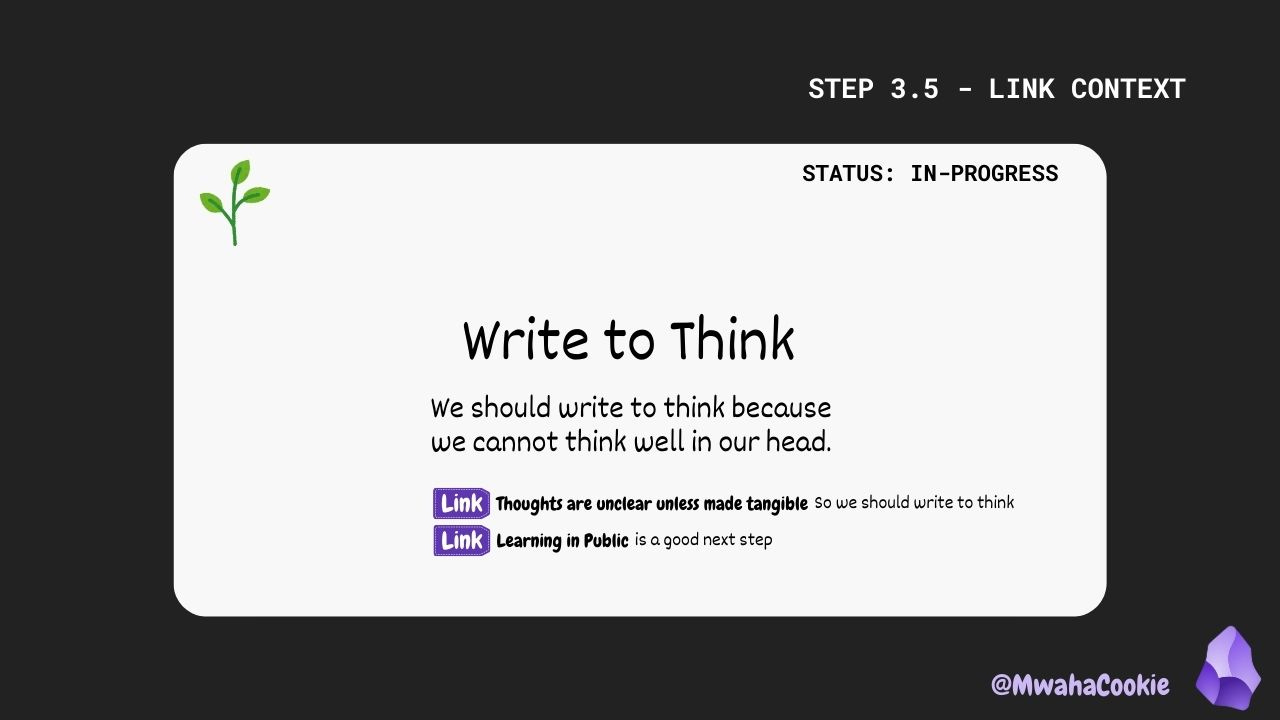
This is good enough, but I like to do one last step:
Add a short annotation for signposting (quick scans)
Check out my realistic Zettelkasten Note Below.
Practical Example from my Zettelkasten
Here I was developing the idea that “We learn differently in the age of AI and information overload”. That is the fleeting thought of this Zettel.
You can see below that I like to develop my ideas in an outliner style where I indent and break up the text into different points.

Annotations are the short labels within my double brackets ((example))
The linked note is in obsidian link formatting [[link|alias]]
I add the context to further explain.
You can also see that I don't necessarily develop all the points into a new note. Only develop what inspires you to keep writing about, you can leave points here to be worked on when you revisit this idea.
Practical Use-Case
🖇️ Creating the Link: Use [[wikilinks]] to link to other notes. When you click on these in Obsidian, a new note is created.
✍️ Making the New Note: See the `prev::` at the start of the note? That is an embedded reference to the first note that inspired this second note.

In Obsidian, I recommend using the “Copy Block Link” plugin to copy the embed with a single hotkey.
✍️ Adding Annotation + Context: In the body of your current note, give a single word annotation of the relation between the notes and write a sentence or two explaining the connection.

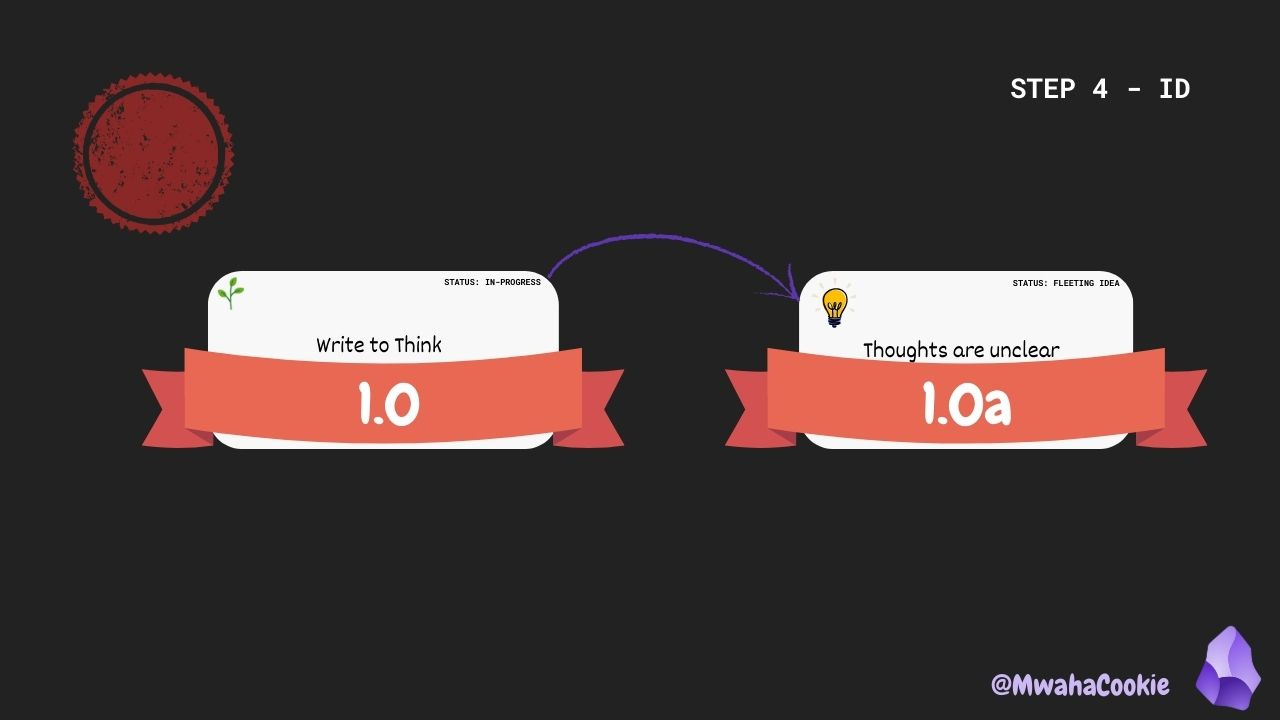
Step 4: 🆔 Assign a Zettel-ID (Optional)
This is a unique identifier that records the chain of thought you had when you originally ideated this note.
Every time you start a session of thinking with your Zettelkasten, your first entry ID number increases. So if I was doing this for the 24th time, my first note will start with `zettel_id: 24.0`.
As you go on, each note gets a new number or alphabet added on. So if you see 24.0a1.0b1.2 you know that this is an idea that you reached after 4 notes. Possibly, a more ‘deep’ or developed thought.
Visual Example:
Let's start with the simplest example.
We have our original note “Write to Think” which is our first note ever so it’s ID is 1.0.
Our second note that was created because of it, gets the ID 1.0a which is “Parent ID” + “my own sequence”.
So how do we increment vs add onto the sequence?
💡 You add onto the sequence: when you are developing a thought off the second note.

💡You increment when your first note, has inspired multiple new notes.
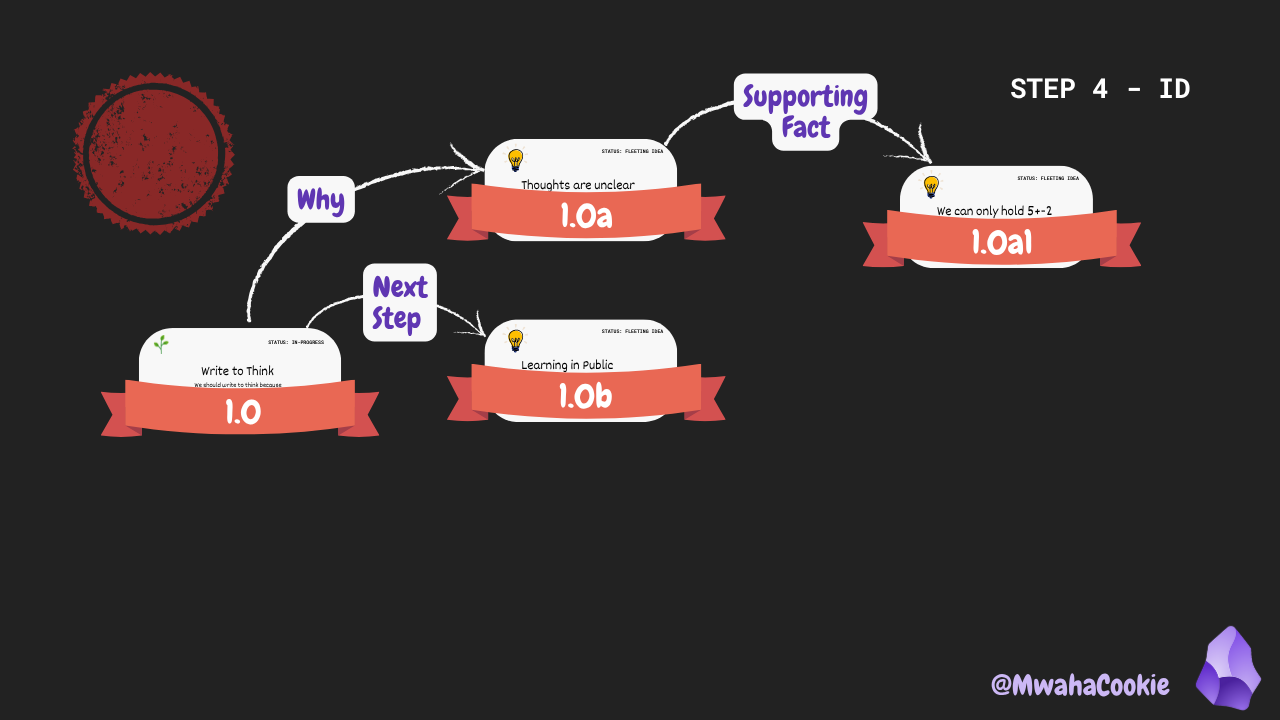
When you increment for alphabets it is (a to z), when you increment for numbers, go (‘11.0 to l1.1’ for the first note and 1 to 2 for the rest).

So why do you go from 1 to 2 instead of by decimal point, after the first note?
It is simpler. The first number is helps me group related trains of thought. So the first number switches, when you have a new idea that feels like a completely fresh start, one that doesn't logically extend or branch from anything currently in your sequence.
Some people use these to represent how ideas relate to each other, so is this idea a sibling or a child, but I found this added a lot of confusion for me, so I use annotations instead.
Practical Use-Case
🔢 Implementing the Zettel-ID in Obsidian: You can use a template to have all your notes start with this default front matter.
This is my Zettel Template.
---
date_created: <% tp.date.now() %>
zettel_id:
---
I use the templater plugin’s folder template option to set all new notes in my inbox to use this template. If you have an obsidian vault, dedicated to your zettelkasten, you can set the vault folder `/` to use this template so all new notes have this meta-data.
Step 5: 🏷️ Tag Your Zettel for Future Discovery
Tags are your broad categories or keywords for discoverability. Think about the themes or topics this note falls under. How might you search for this idea in the future if you didn't know its exact title?
This is also where you use aliases. When you are writing, how else would you word this idea?
Visual Example:
I tagged with
Topic: Zettelkasten
Topic: KnowledgeWork
Question it answers: Why-Write
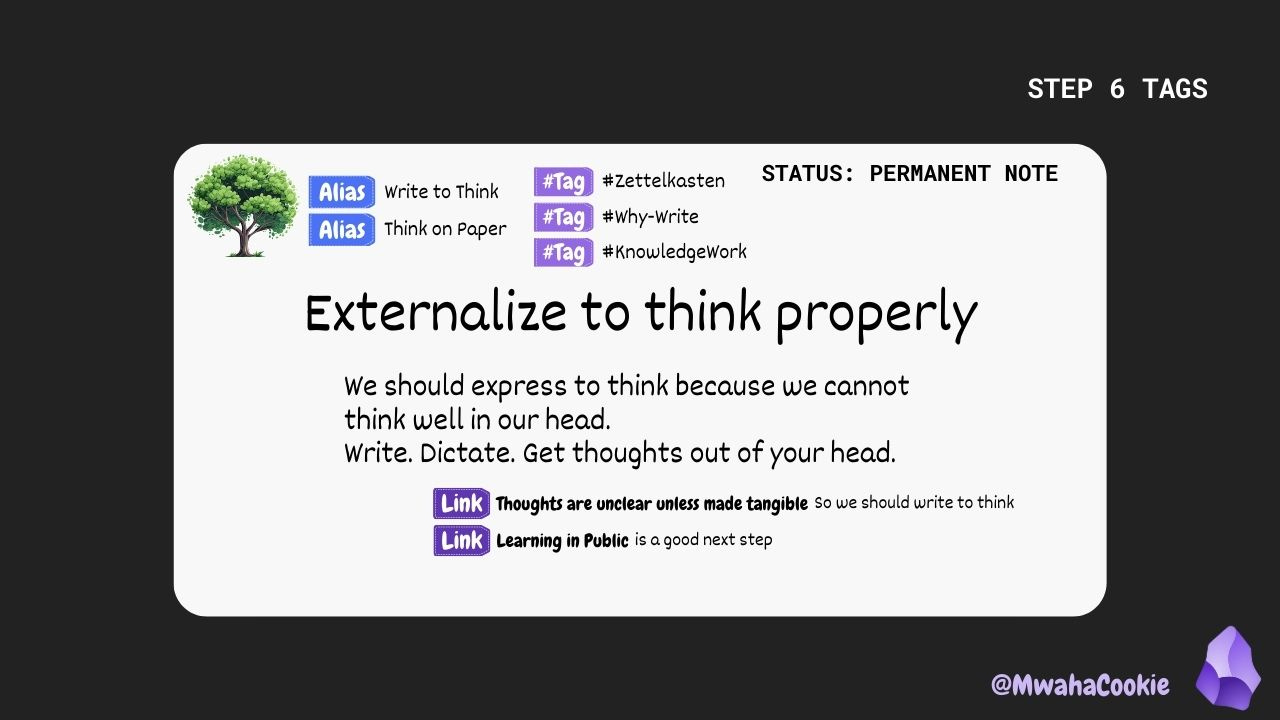
So you may have noticed that I I have two different ways of joining words together. With a dash and without.
This is up to you, I used to do ‘CamelCase’ which is without the dash, and I am moving my system to using the dash for readability.
Practical Use-Case
🔎 Adding Your Tags: Add tags using #tagname in the body of the note or in the front matter (e.g., tags: [zettelkasten, productivity, learning]).
I prefer to add it in the body of the note because then I can click on it easily to search. Putting it in the front matter is cleaner.
🏷️ Adding Your Aliases: Add Aliases into the front matter, and they will be automatically in the search suggestions, and this is super helpful if you are using the Various Complements Plugin to suggest links as you type.
---
aliases:
- Second Name
- Third Name
---

#First-Tag #Second-Tag
This is what it looks like, I use a snippet expander to get this aliases block pasted in when I type `alias,,` but you can also set this in your template.
Step 6: 📢 Title Your Zettel with a Permanent Statement
This is key for making your notes easily understandable and linkable later.
Aim to title your Zettel with a permanent, declarative statement that summarizes the core insight of the note.
Instead of "Linking Notes," try "Contextual Links Enhance Future Understanding." This makes your note's purpose clear at a glance.
Visual Example:
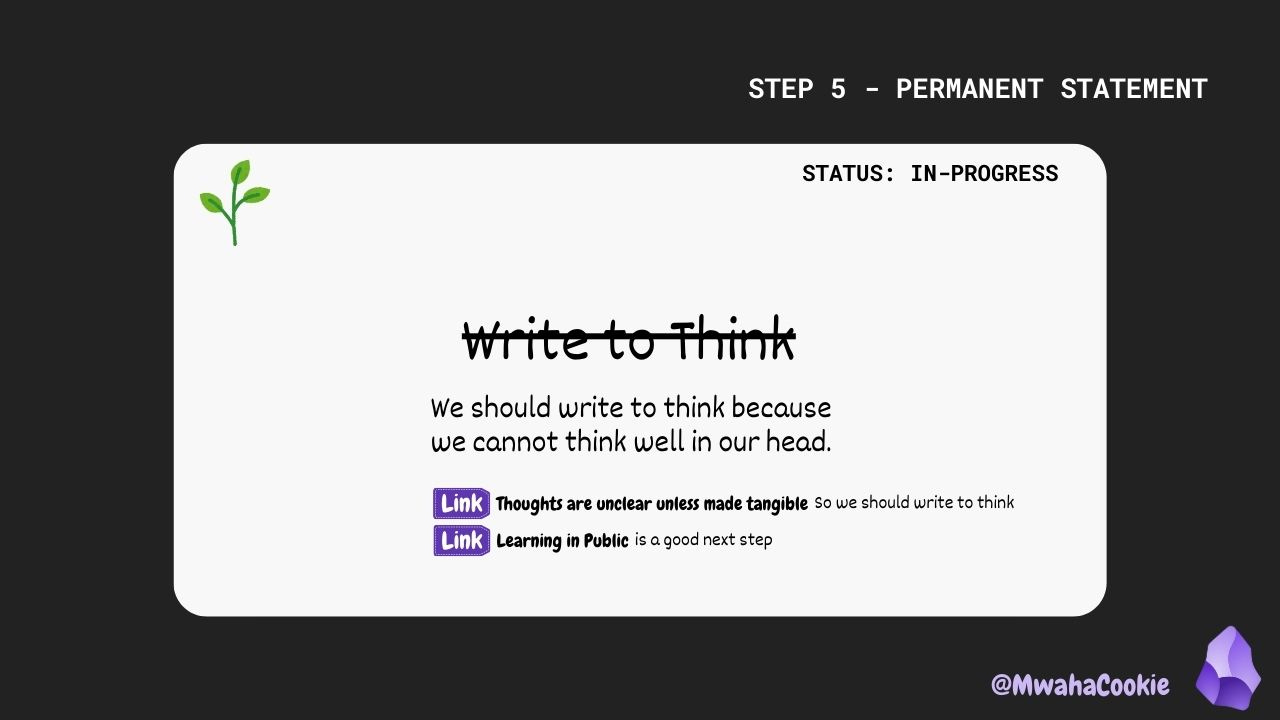
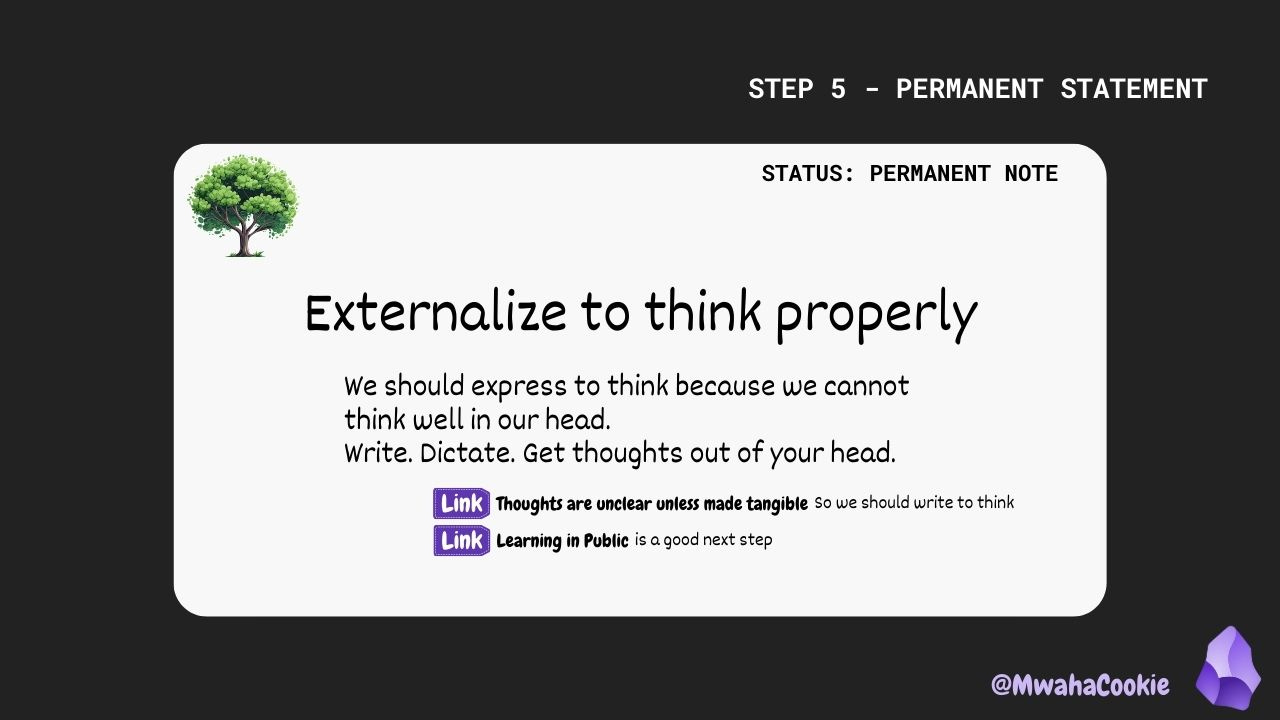
If there are multiple titles that you like, you can set the other titles in the aliases.
Step 7: 🧭 Link Your Zettel to a Hub Note (Your Growing Index)
Your Zettelkasten is a huge interconnected web.
To navigate it effectively, you need a map. Link your new, developed Zettel to a relevant "Hub Note" or "Map of Content (MOC)."
This helps you rediscover and build upon your ideas later.
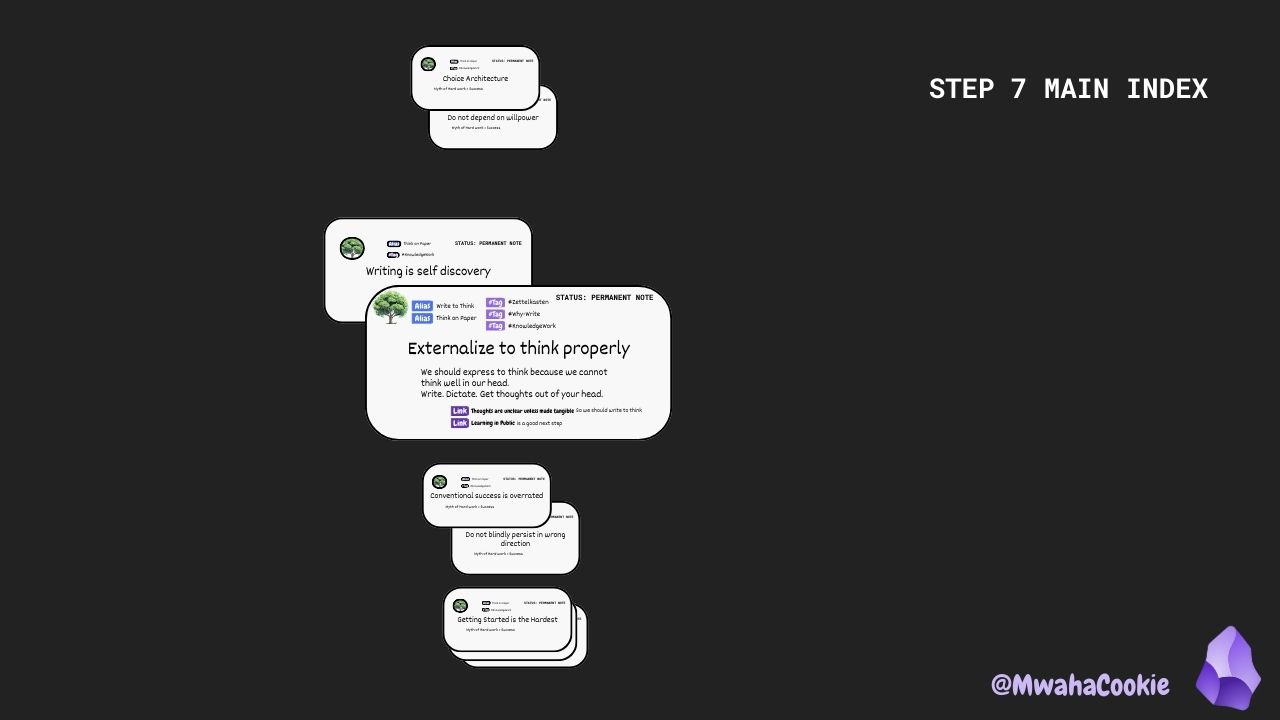
The simplest form of this, is having a main Index note (aka a single hub note).
Visual Example:
To decide where to put it, you need to scan your index note and see where does this new idea fit into the bigger picture of your existing thoughts?
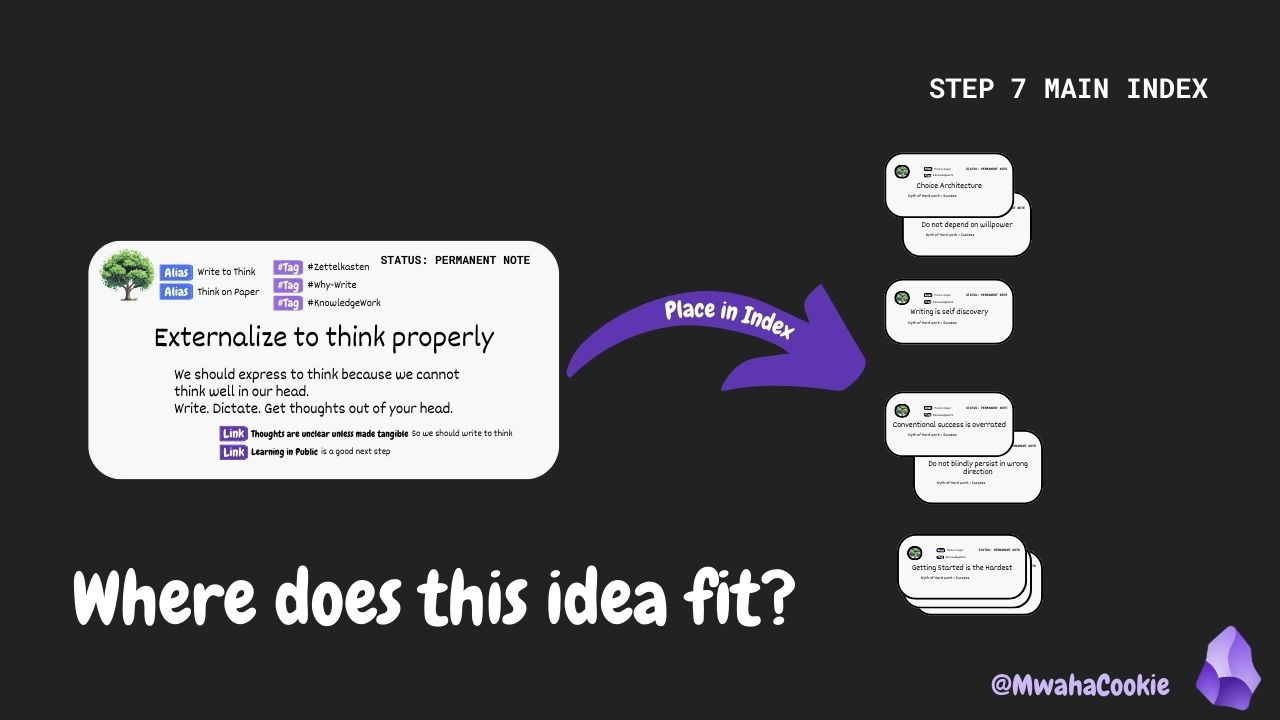
Usually we have headings by topics, and within that topic, we set up an outline (nested bullet list). Add your newest note within that hierarchy of ideas with a link to it.
Practical Use-Case
🗺️ Connecting to the Map: Open your Index note (or a relevant MOC like "Productivity MOC") and add a [[wikilink]] to your newly created Zettel, perhaps under a relevant heading.
⚡ Quick Recap: The 7 Zettelkasten Kickstart Steps
Just to refresh, here are the core actions you'll take:
✍️ Capture Your Fleeting Idea
🧠 Develop with Your Insight
🔗 Link & Explain
🆔 Add a Zettel-ID
🏷️ Tag for Discovery
📢 Title with a Permanent Statement
🧭 Link to a Hub Note
Let’s do this!
Stop overthinking. Stop drowning in theory.
Open Obsidian, grab one thought, observation, or piece of information you encountered today, and walk through these 7 steps.
You don't need complex theories to begin, just the willingness to try. You'll be surprised how quickly you can move from confusion to clarity, laying the foundation for a truly powerful personal knowledge system.
I'd love to hear how your first "5-Minute Zettelkasten" session goes! Let me know in the comments below, if this worked out for you.
Want to see the full 22 minute process of making a Zettel in Obsidian?
Want to make this easier?
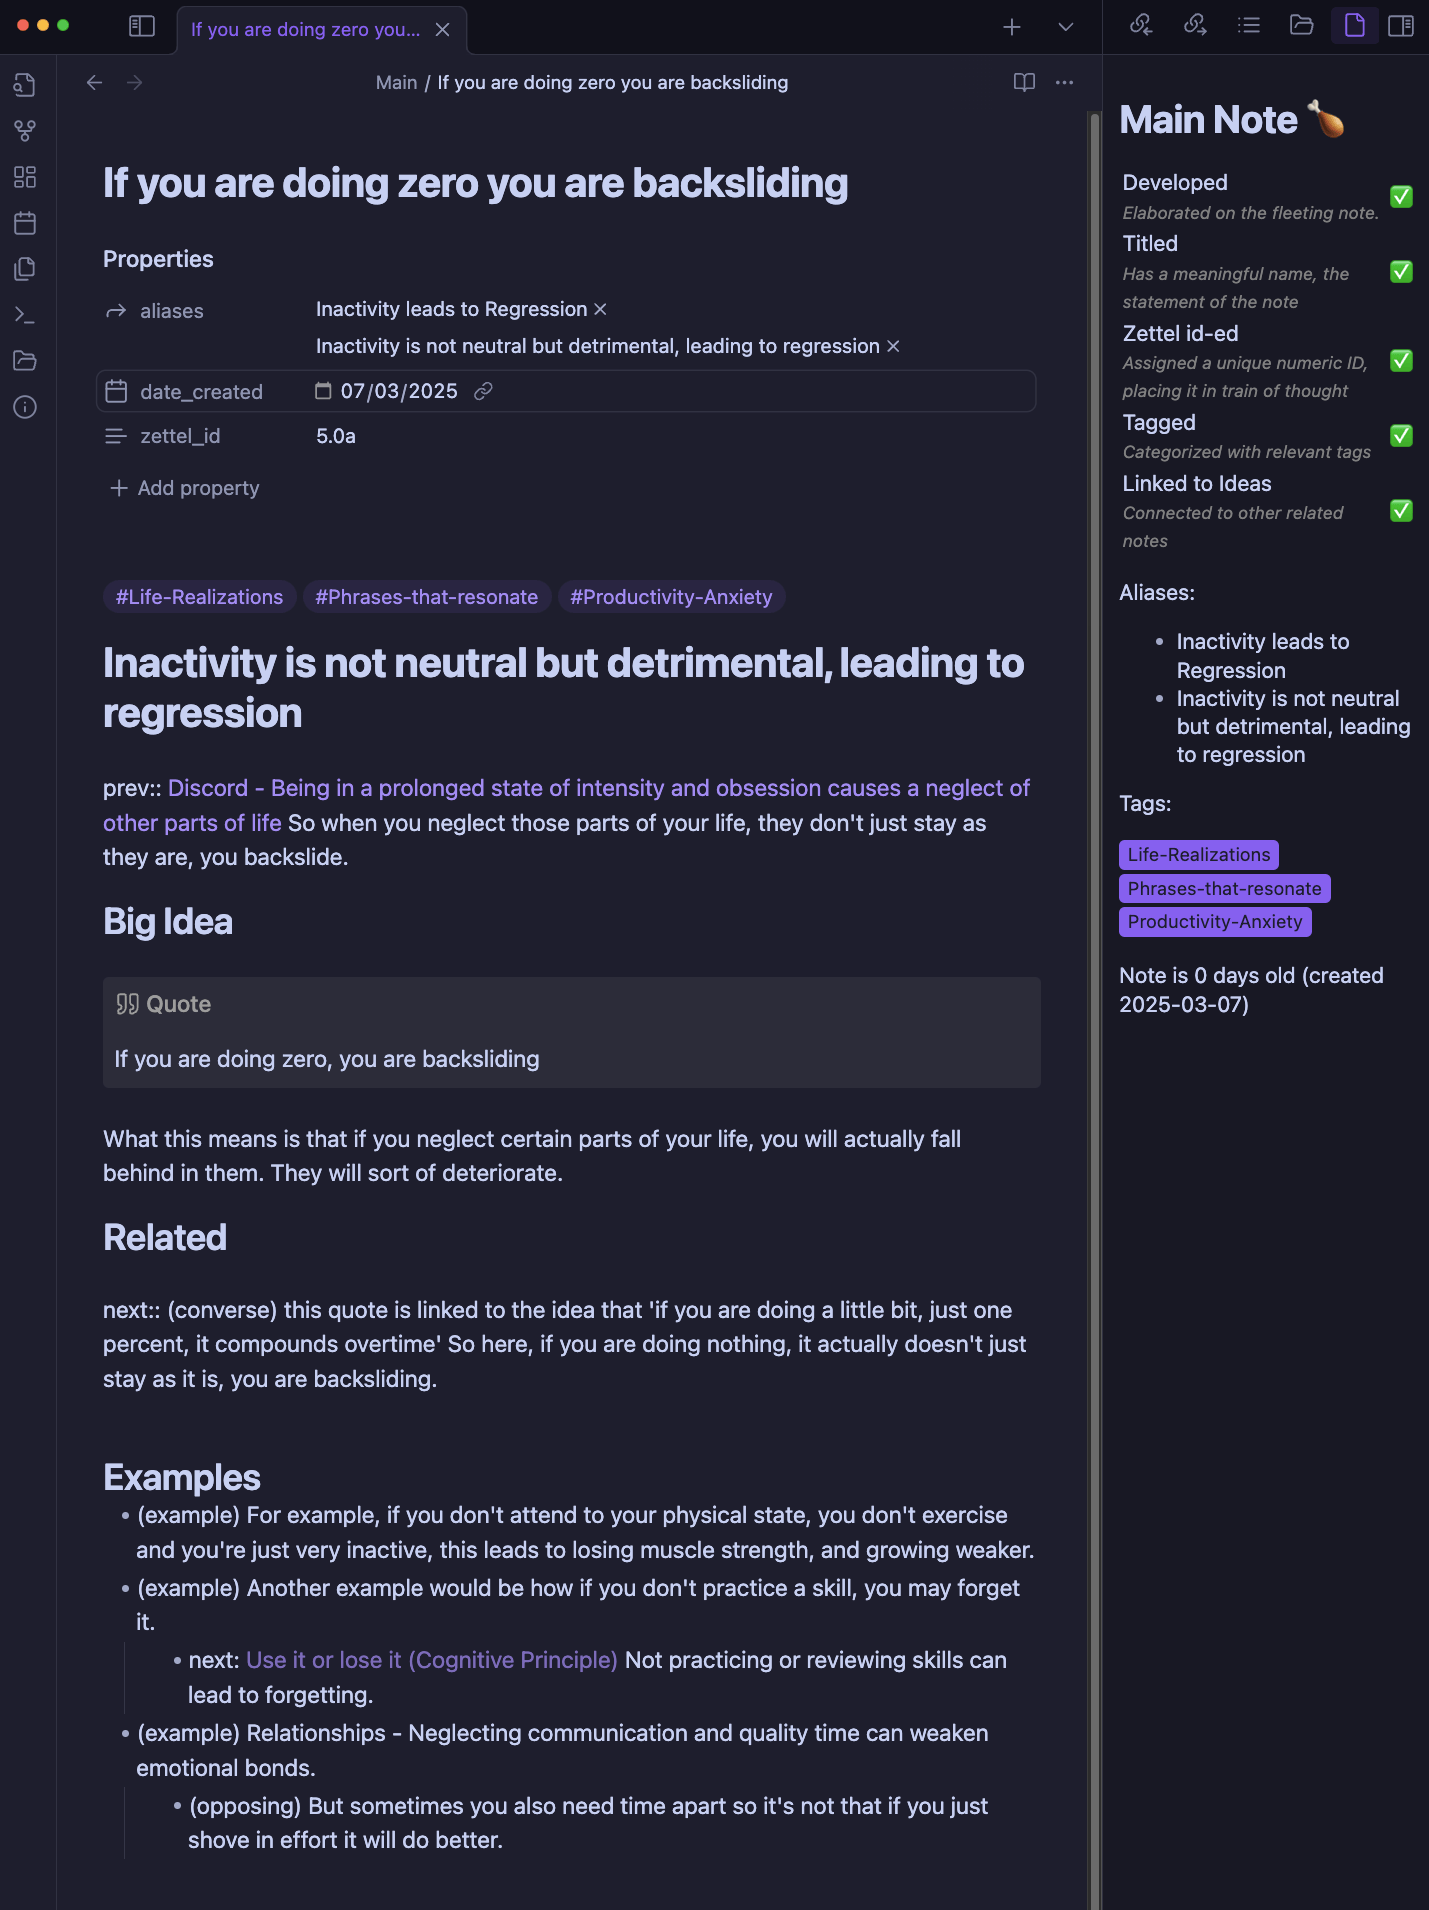
I have a free Obsidian plugin that I use to keep track of my Zettel development progress: Zettel Status Sidekick which makes the checklist you see below.
Next Reads 📚
How I Structure My Zettelkasten using folders to represent steps in my workflow (Coming out soon)
🔖 Recommendations: Placing my Zettelkasten Philosophy
The absolute best guidebook to the Zettelkasten Method is Bob Doto's System of Writing Book.
If you want to engage with these ideas, in a more guided way, check out the Zettelkasten philosophy from Roam Book Club 4. It’s a series of free recordings, you can follow along every day for a month, and by the end of it, you will have gone through outliner style zettelkasten in-depth.
Very clear introduction to Zettelkasten method, Pamela. I'm using Obsidian as well but haven't started using this exact method yet.